
Docs#
Docs are the organization’s knowledge base. You store internal procedures, prompts, client briefs, or notes here – and the AI draws on them in the chat when the Docs extension is enabled. With this extension, the AI can also create and edit documents.
Page layout#
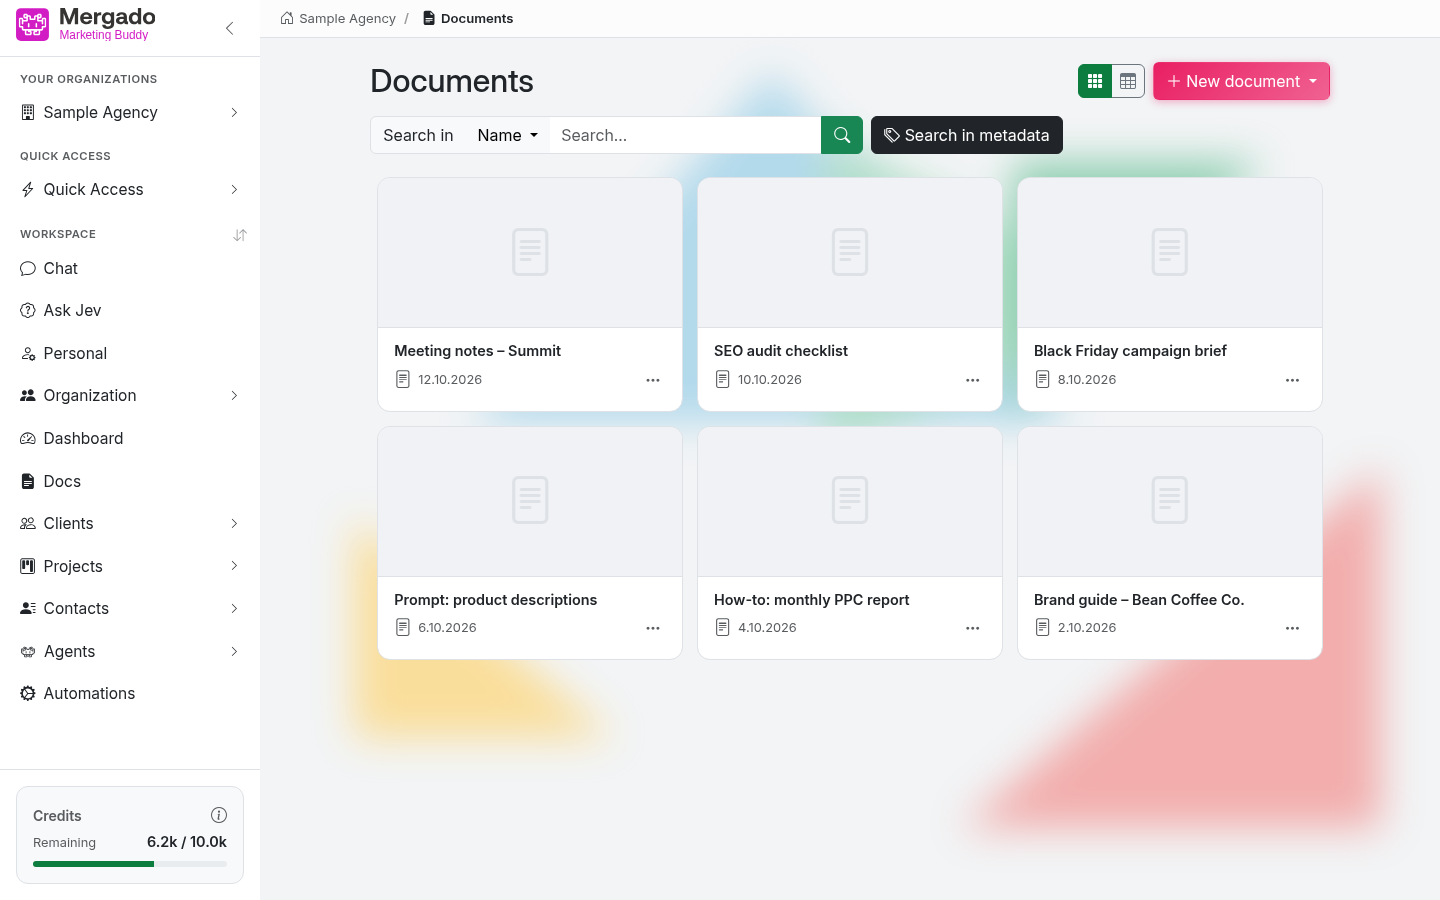
- The Docs heading, a switch between card view and table view, and the New document button with a drop-down menu.
- The search bar: the Search in switch (Name = by name, Content = by content), a query field, and the Search in metadata button. Start the search with Enter or the magnifying glass; cancel it with the cross.
- A grid of document cards, sorted from the most recently changed. Each card shows a content preview, the name, and the date of the last change. More documents load as you scroll down the page.
Click a card to open the document preview. The “…” icon on the card offers these actions:
- Edit – opens the editor
- Copy link – copies the public link to the document (works only for documents with the Publicly visible option)
- Add to Quick Access
- Delete – after confirmation, deletes the document together with its metadata and assignments
Any member of the organization can create, edit, and delete documents.
Creating and importing#
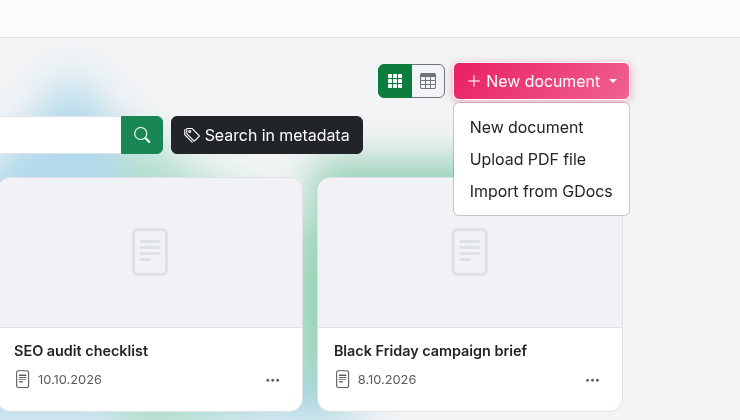
The New document menu offers these options:
- New document – a blank document in the editor
- Upload PDF file – a PDF of up to 10 MB is converted to text in Markdown format. This only works for PDFs with a text layer (not scans), and images from the PDF are not transferred. The document name is optional – if you leave it empty, the file name is used.
- Import from GDocs – imports a document from Google Docs by URL. The document must be shared so that “anyone with the link” can view it.
- Import from Nextcloud – appears only when the organization has Nextcloud connected in Credentials. Check TXT, MD, or HTML files in the folder tree (up to 50 at a time) and click Import selected to turn them into documents.
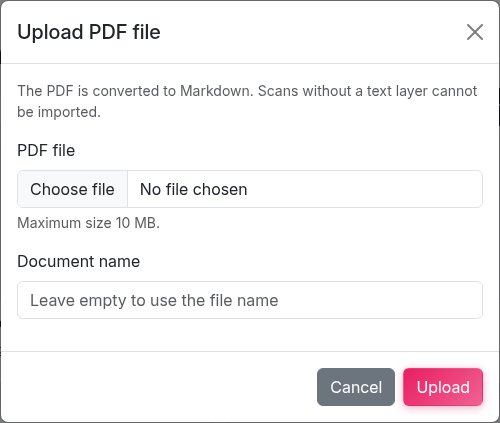
Imported documents are publicly visible straight away; documents created in the editor are not. The document name must be 3 to 200 characters long.
Document editor#
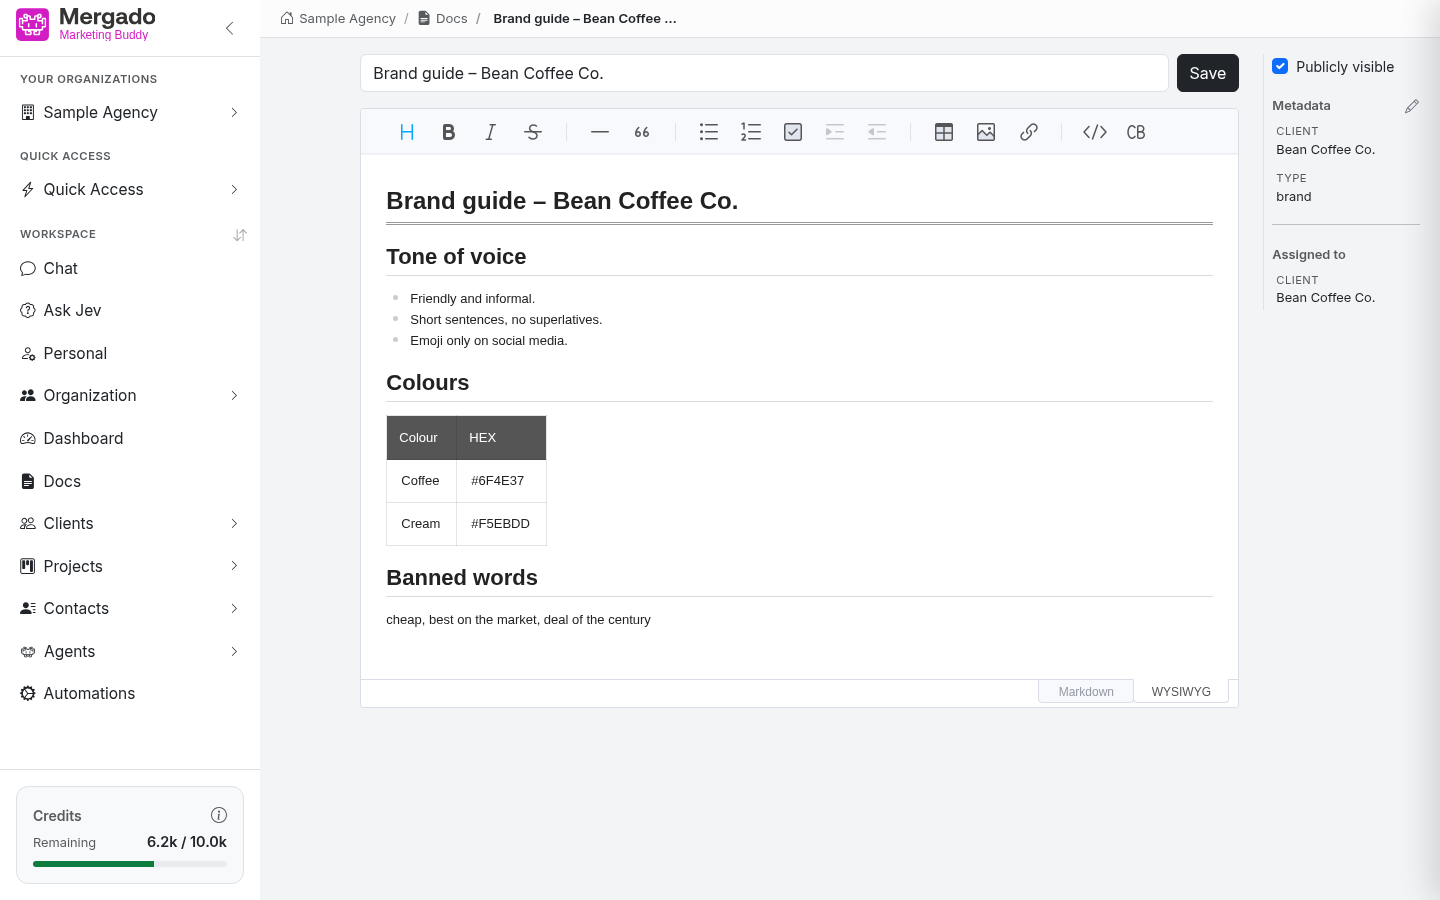
At the top of the editor is a field for the document name and the Save button, with a formatting toolbar below it (headings, bold, italics, strikethrough, divider, quote, lists, checklist, indentation, table, image, link, code, and code block). In the bottom-right corner, you can switch between writing in Markdown (formatting with marks such as # for a heading) and the visual WYSIWYG mode (you see right away how the text will look). The editor controls are in English.
The right column contains the document properties:
- Publicly visible – publishes the document at a public address. If it is not checked, the public link returns a 404 error.
- Metadata – custom labels in the form of a name and value (e.g.
client: Smith) that you can use to filter documents. - Assigned to – assigns the document to a client, project, or contact person.
Document properties#
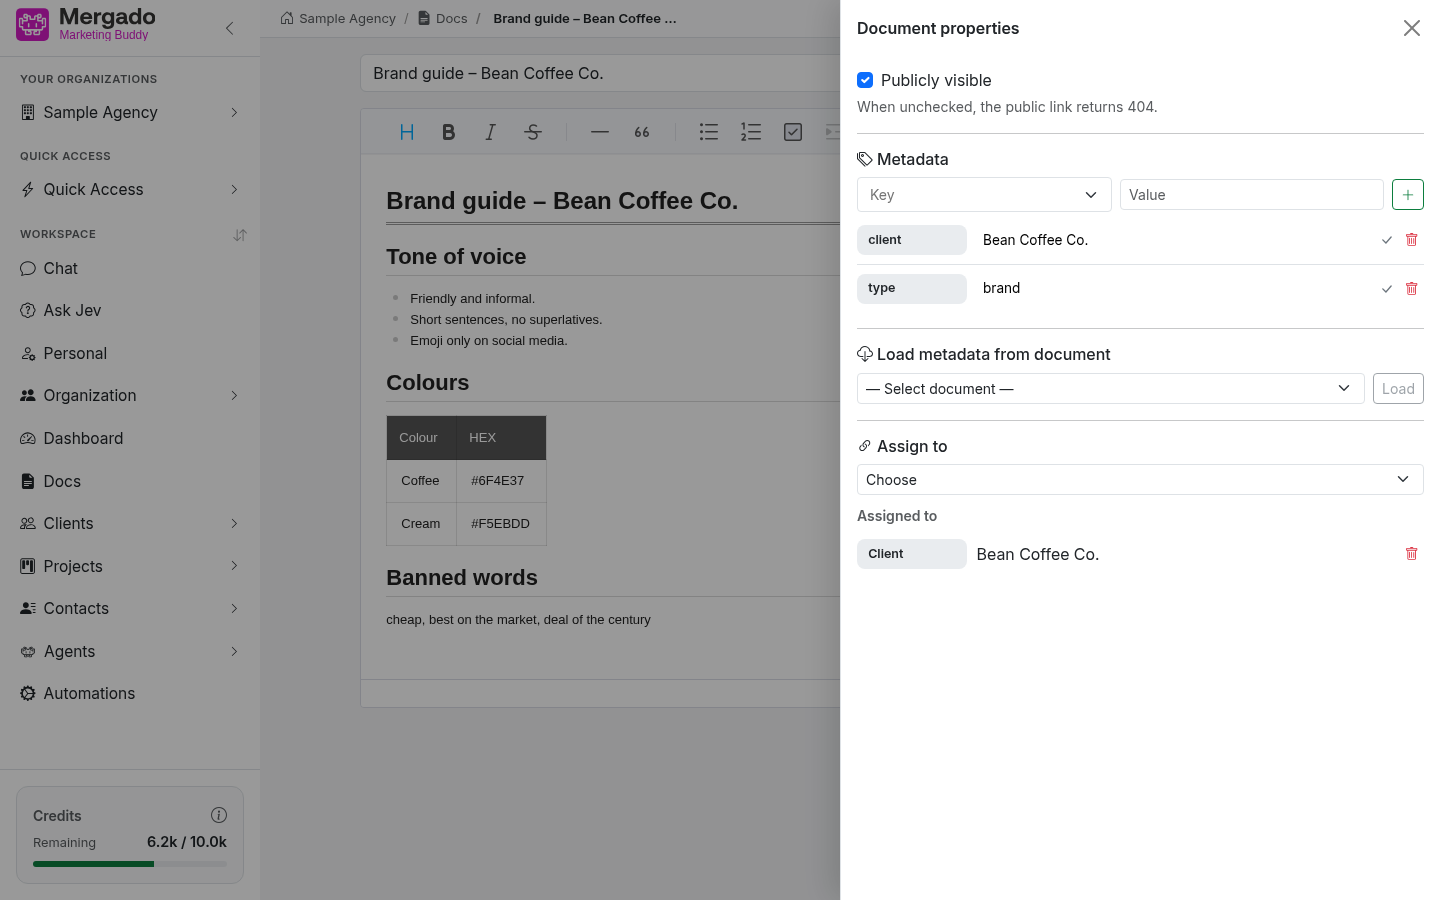
Click the pencil next to the metadata (or the list of metadata or assignments) to open the Document properties panel:
- Metadata – add a key and value pair with the + button; keys are suggested from other documents. Edit a value directly in the list and confirm it with the check mark; delete it with the trash icon.
- Load metadata from document – takes over the metadata from another document. Matching keys are rewritten, new ones are added, and nothing is removed.
- Assign to – select the type (client, project, contact person), the specific record, and click Assign. Remove an assignment with the trash icon.
For an existing document, changes to metadata and assignments are saved immediately. The Save button in the editor saves the name, content, and the Publicly visible option. For a new document, everything is saved only when you click Save.
Document preview#
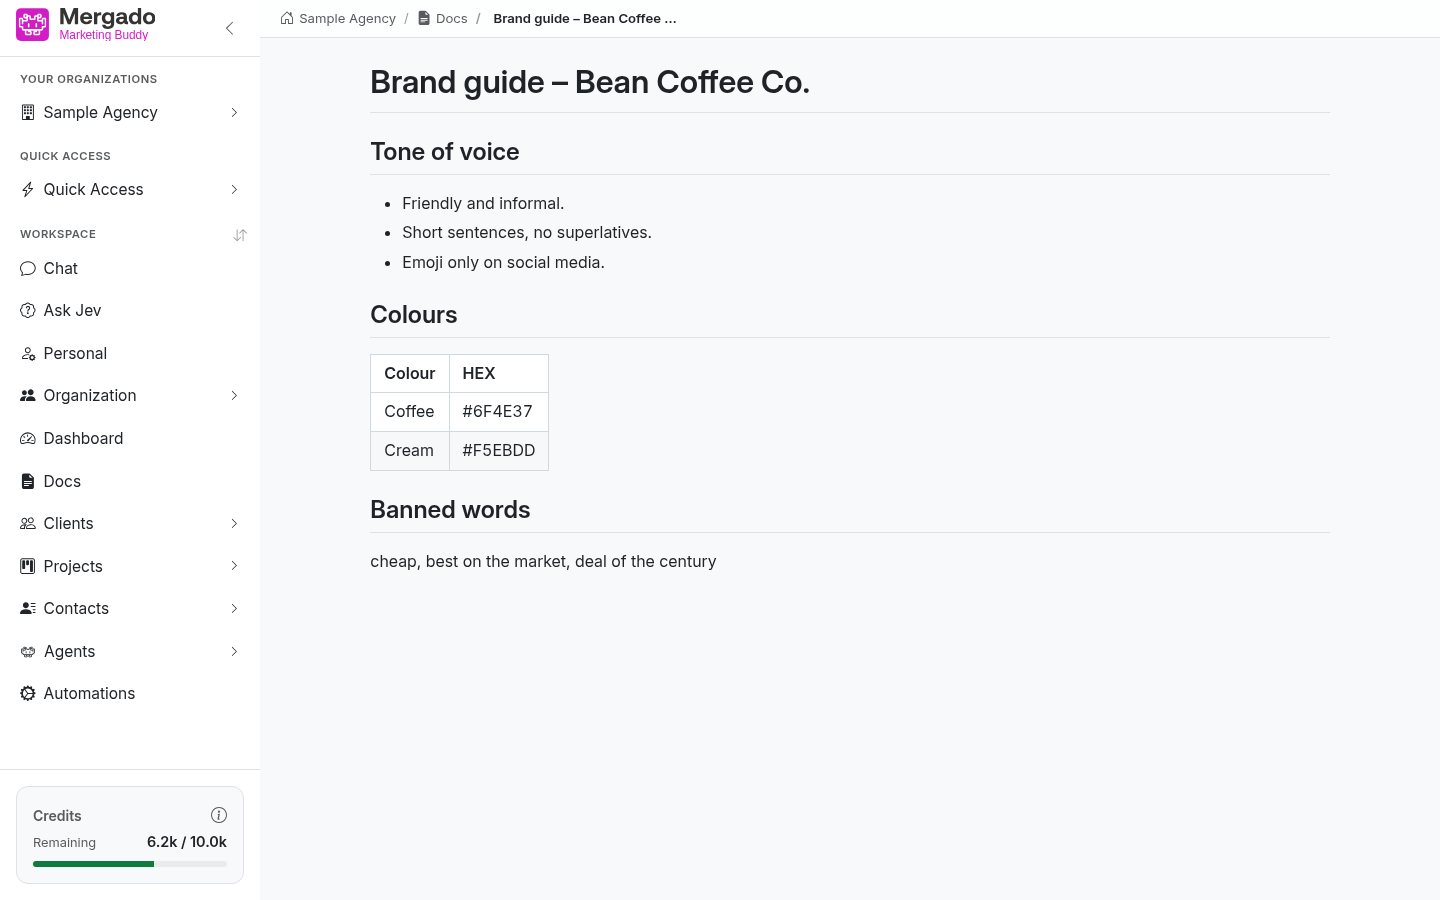
Click a card to display the document as formatted text. To make changes, use the Edit option in the “…” menu on the card.
Searching in metadata#
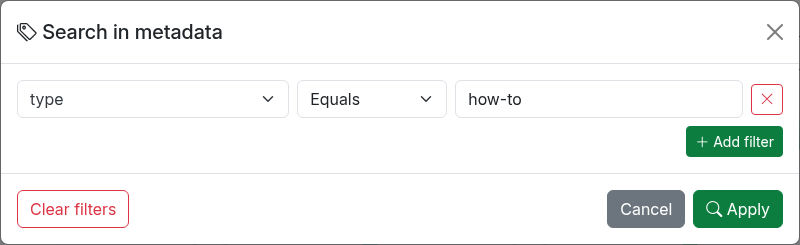
The Search in metadata button opens a dialog where you build filters on metadata keys. Each filter has a key, a condition (Equals, Does not equal, Contains, Is empty, Is not empty), and a value; add more with the Add filter button. A document must meet all filters at once. Recently used filters are offered as Recent filters.
The Clear filters button empties the rows in the dialog, and Apply applies the filters. The number of active filters is shown on the Search in metadata button.
What you can do here#
- Create your own document, upload a PDF, or import a document from Google Docs or Nextcloud.
- Add metadata to documents and filter by it.
- Assign a document to a client, project, or contact person.
- Publish a document and share its link.
- Pin a frequently used document to Quick Access.
FAQ#
How do I get the AI to use a document? Keep the Docs extension enabled in the chat. The AI finds documents on its own; you can point to a specific document by typing @ and the document name in your message.
Who can see the documents? Members of the organization. People outside the organization can only see documents with Publicly visible enabled, and only via the public link.
What is metadata for?
For your own sorting – for example, a client or type key. You can then filter by it via Search in metadata, and the AI can work with it too.
Why was my PDF not imported? It is probably a scan without a text layer, or the file is larger than 10 MB.