
Clients#
The Clients section is a simple CRM. You keep records of clients here, to which projects, contact persons, and documents are then linked. In the chat, the CRM extension can work with the CRM data – it can search for, create, and edit clients, projects, and contacts.
Page layout#
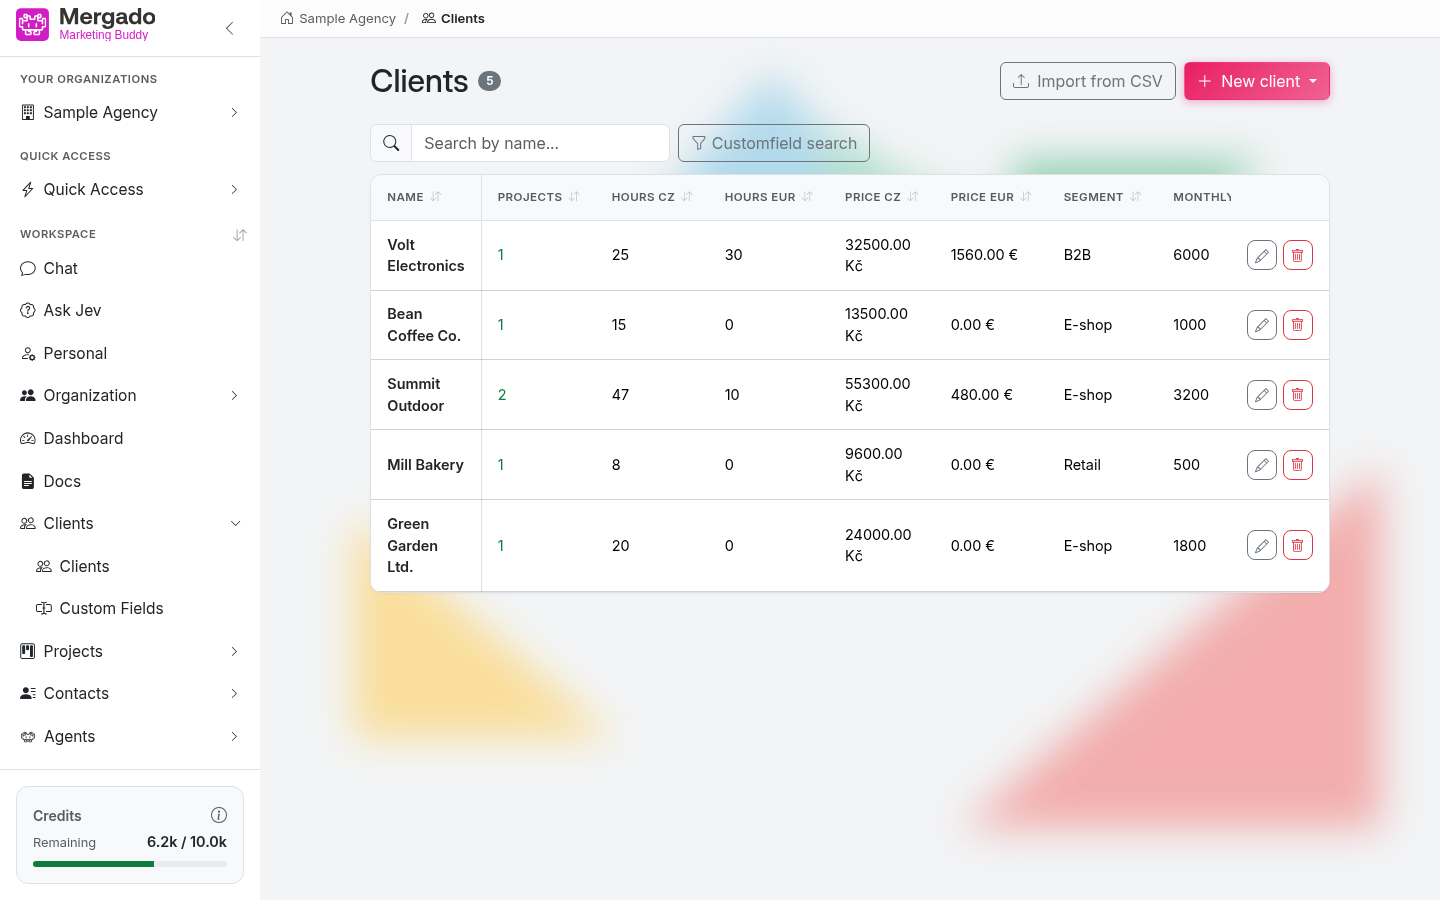
- The Clients heading with the number of records, the Import from CSV button, and the New client button.
- The Search by name… field – filters the table as you type.
- The Search in custom fields button – searches by the values of custom fields (see below).
- A table of clients with the columns Name, Projects (number of linked projects), Hours CZ, Hours EUR, Price CZ, and Price EUR. Hours and prices are totaled from the linked projects (price = hours × hourly rate).
- These are followed by custom fields with the Show in overview option. The first column and the column with buttons stay in place; with more columns, the middle part of the table scrolls sideways.
- At the end of each row are buttons for editing (pencil) and deleting (trash).
The number in the Projects column is a link – click it to go to Projects filtered by that client. Click a column header to sort the table (first click ascending, next click descending).
In the left panel, the section has two items: Clients (the list) and Custom fields.
Searching in custom fields#
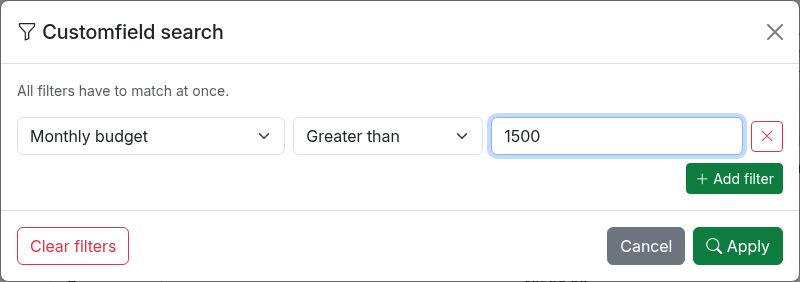
The Search in custom fields button opens a window with filters. In each row, select a custom field, a condition (Equals, Does not equal, Greater than, Greater than or equal to, Less than, Less than or equal to, Contains, Does not contain, Regular expression, Is empty, Is not empty), and a value. Click Add filter to add another condition – a record passes only if it meets all of them. Apply applies the filters, Clear filters empties them. The number on the button shows how many filters are active.
You can search in all custom fields, not only in those shown in the overview. Filtering works on records that are already loaded, so the page does not reload; the filters are cleared when you reload the page. The same search is available in Projects and Contacts.
Import from CSV#
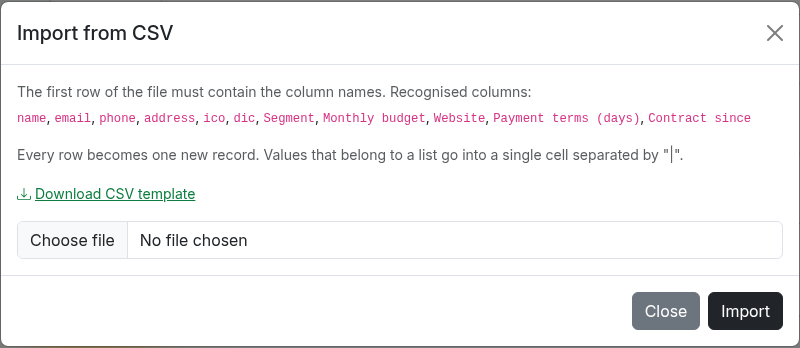
Use the Import from CSV button to create several clients at once. The first row of the file must contain the column names – name, email, phone, address, ico, dic, and the names of your custom fields are recognized. Each row creates a new client. Use the Download CSV template link to get a sample file. The file can have up to 2 MB and 2,000 rows; the separator (comma, semicolon, tab) is detected automatically. The dialog lists any rows that could not be imported, together with the reason.
New client and editing a client#
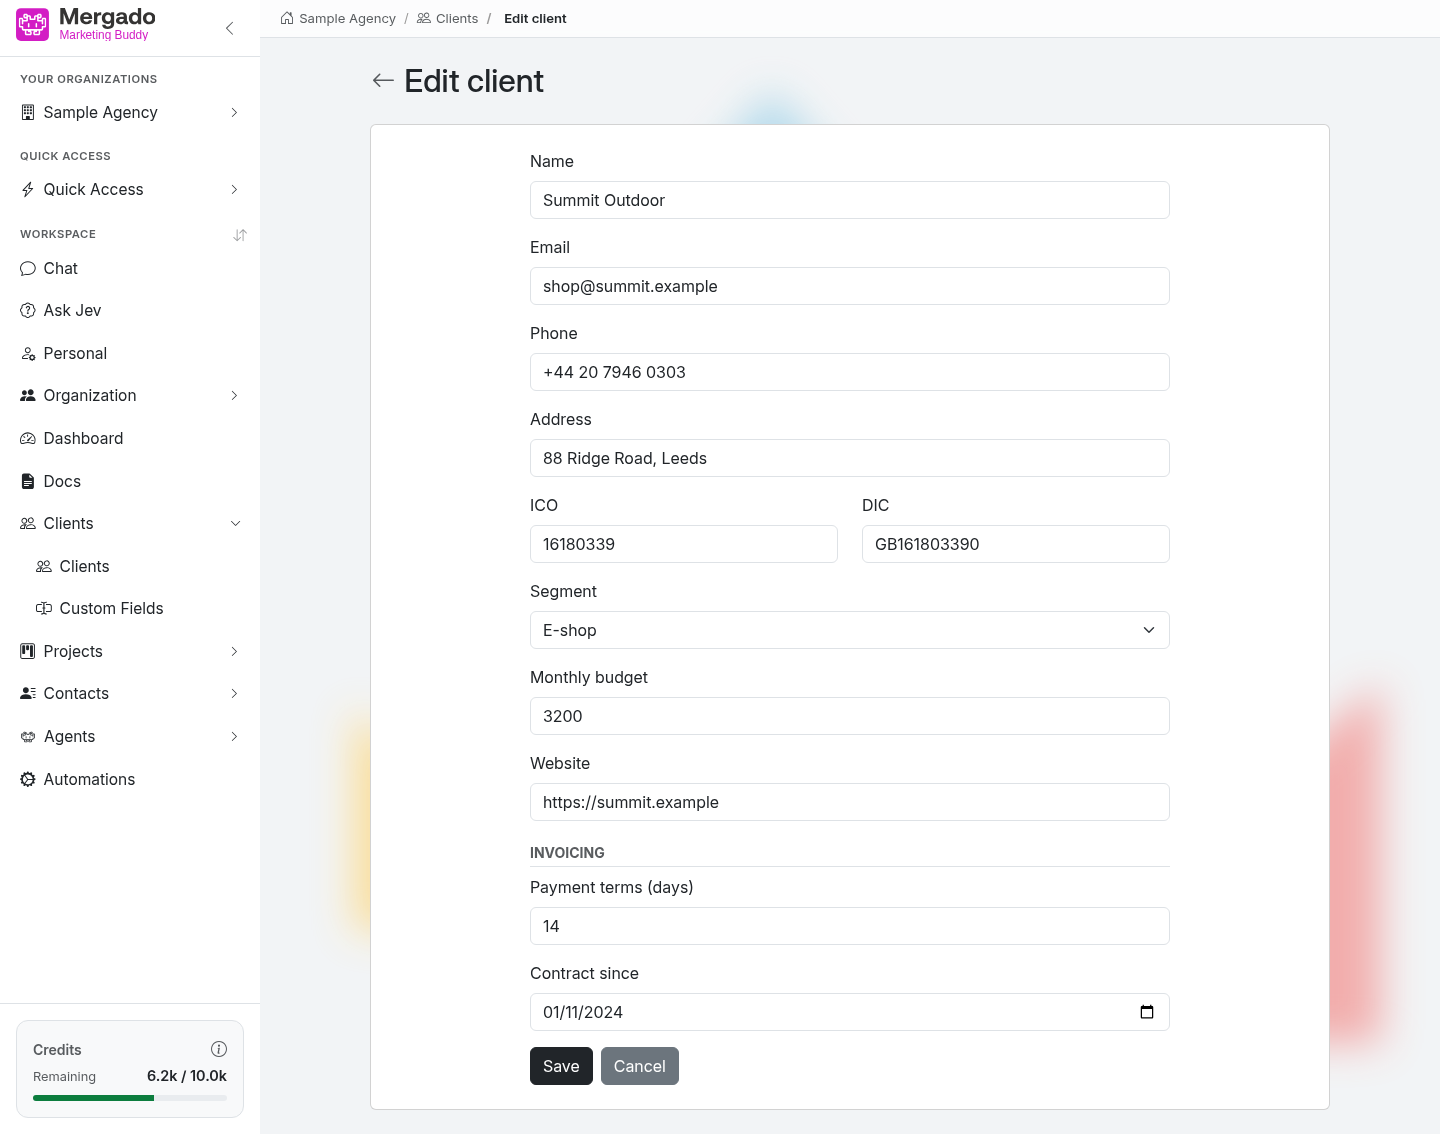
The form contains the basic fields Name, Email, Phone, Address, Company ID, and VAT ID, followed by all custom fields the organization has defined. Name, email, phone, and address are required; company ID and VAT ID are not. Save with the Save button, or leave the form with the Cancel button.
Editing a client looks the same, only with prefilled values. If a custom field has an agent set up for automatic filling, there is a Fill with agent link below it – the agent looks up the value and saves it right away.
Custom fields#
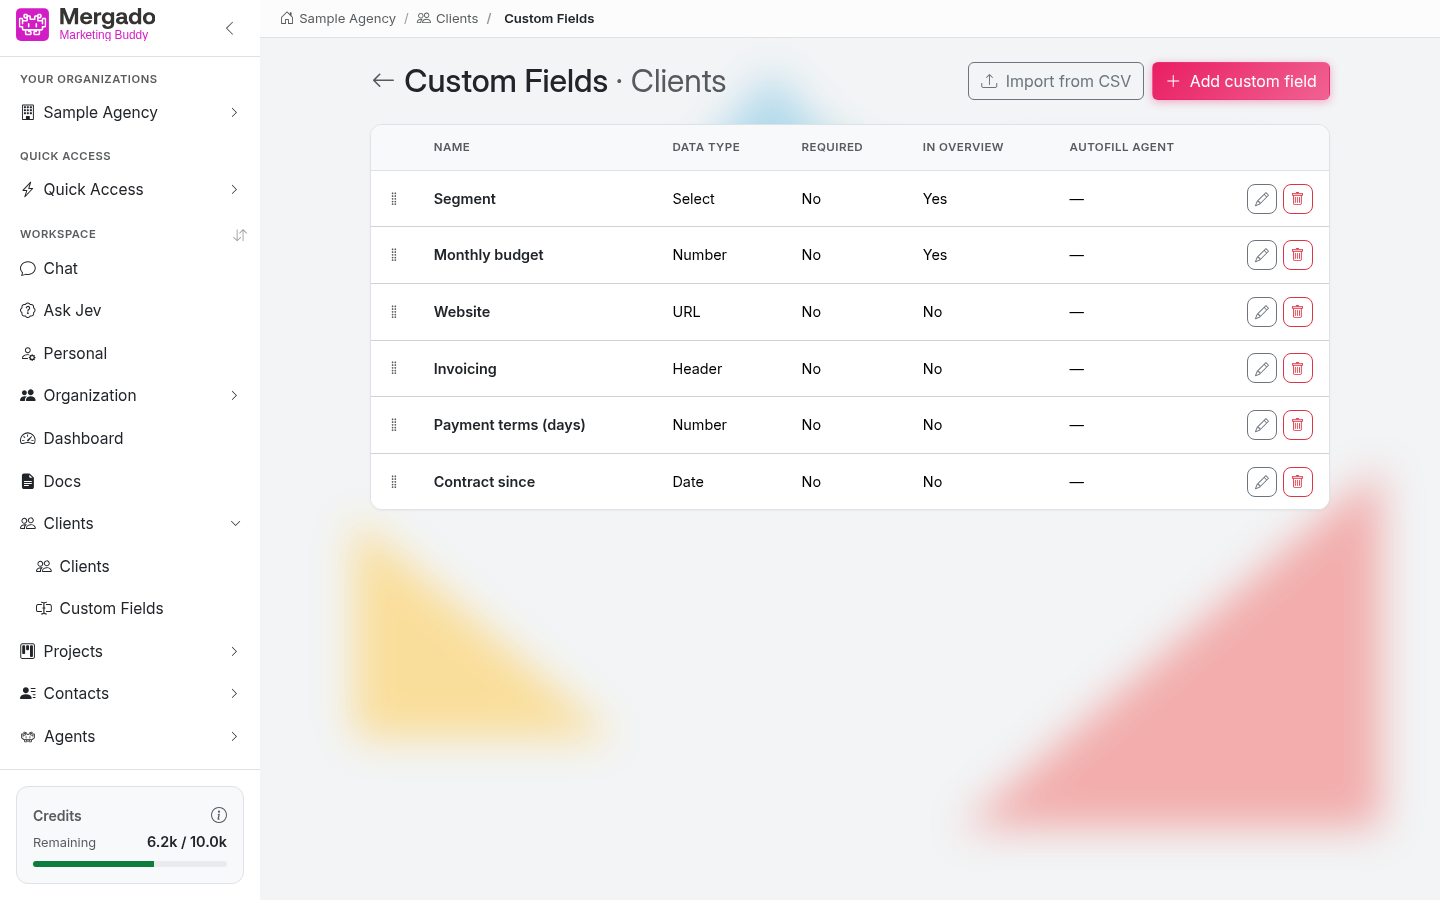
On the Custom fields page, you can tailor the records to your needs. Add a new field with the Add custom field button, edit it with the pencil, and delete it with the trash icon (deleting a field removes all its values). The table has the columns Name, Data type, Required, In overview, and Agent for automatic filling; change the order of fields by dragging the handle on the left. You can also import field definitions from a CSV.
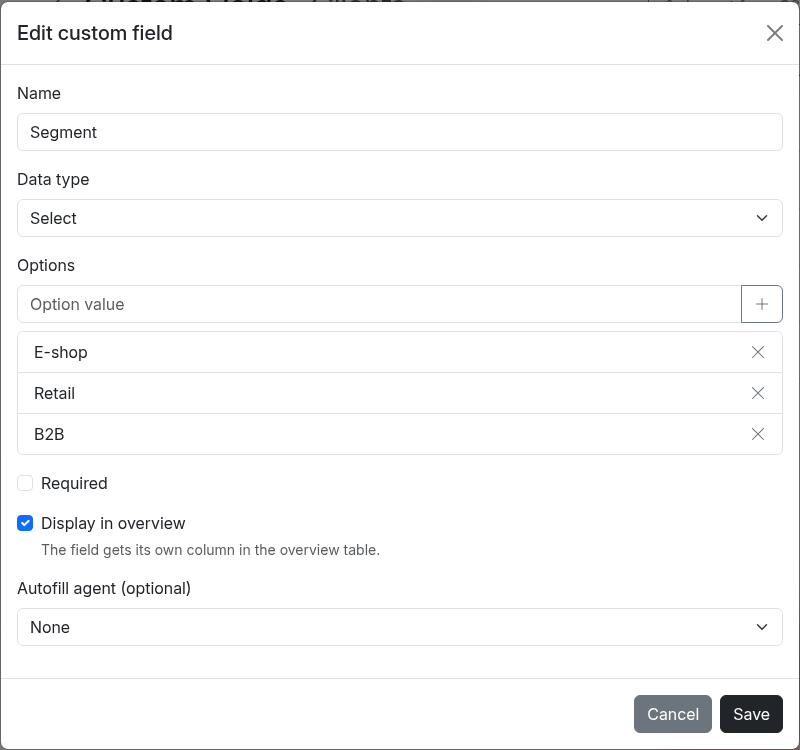
Supported data types: Text, Number, Date, Time, Select (from options you list), Checkbox, Color, Password, Email, URL, and Header – this is not a data field, just a visual divider displayed as a heading in the form.
- Required – the client cannot be saved without filling in the field.
- Show in overview – the field gets its own column in the overview table.
- Agent for automatic filling – optional. Assign an organization agent to the field that can look up its value (for example, billing details). It runs via the Fill with agent link when you edit a client.
The Header type cannot be required, shown in the overview, or have an agent, because it carries no value.
What you can do here#
- Keep records of clients and link projects and contacts to them.
- Import clients from a CSV.
- Extend the records with custom fields to suit your agency’s needs and show selected ones directly in the overview.
- Search for clients by the values in custom fields.
- Let an agent fill in selected fields.
- Track how many hours and how much money are totaled for a client from its projects.
FAQ#
Where do the hours and prices in the overview come from? They are totaled from the projects assigned to the client.
What happens to projects when I delete a client? The client’s projects and contact persons are deleted too – the application warns you about this before deleting. Documents remain; only their assignment to the client disappears.
How can I quickly find a client from anywhere? Use search with Ctrl+K – it searches by name and company ID. In the chat, you can mention a client by typing @.