Connecting Mergado MCP to Cursor#
What is Cursor?#
Cursor is an advanced AI code editor built on the foundations of the popular Visual Studio Code. Unlike regular editors with attached AI plugins, it has artificial intelligence integrated directly into its environment. It can perceive the context of an entire project, suggest code changes, or act as an intelligent AI agent right in the chat.
Because Cursor is based on Visual Studio Code, it retains support for most extensions, themes, and user settings.
Integration via MCP#
Besides working with source code, Cursor also supports the Model Context Protocol (MCP). This is an open standard that lets AI communicate securely and in a structured way with external services.
By connecting Mergado MCP, Cursor gains access to your projects, product feeds, and other Mergado features. This gives the AI context about your data and lets it work with it directly – for example, answering questions, analyzing product data, or helping you create rules and transformations.
Info: Cursor currently does not support OAuth authentication for remote MCP servers. To connect to Mergado, you therefore need to use a Personal Access Token (PAT).
Connection details#
| Detail | Value |
|---|---|
| MCP server URL | https://mcp.mergado.com |
| Authentication | Personal Access Token (PAT) |
1. Create a Personal Access Token (PAT)#
First, you need to create a Personal Access Token (PAT), which Cursor will use to communicate with Mergado.
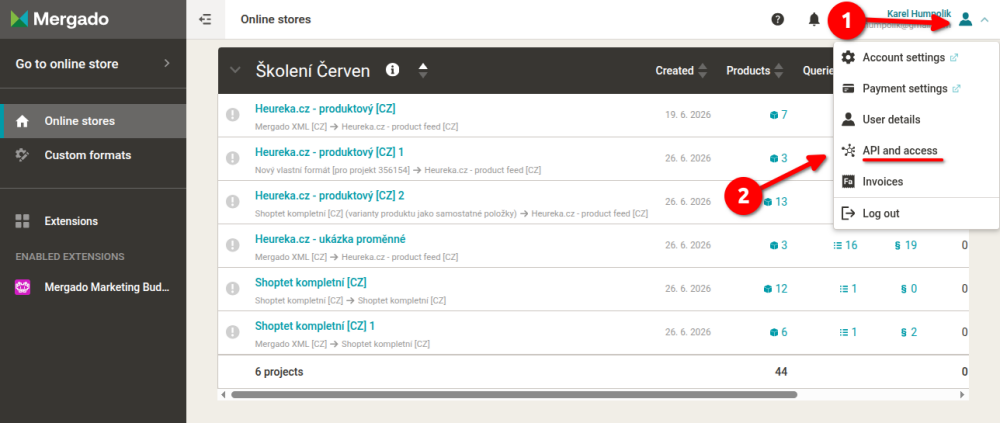
In Mergado Editor, click your profile and select API and Access.
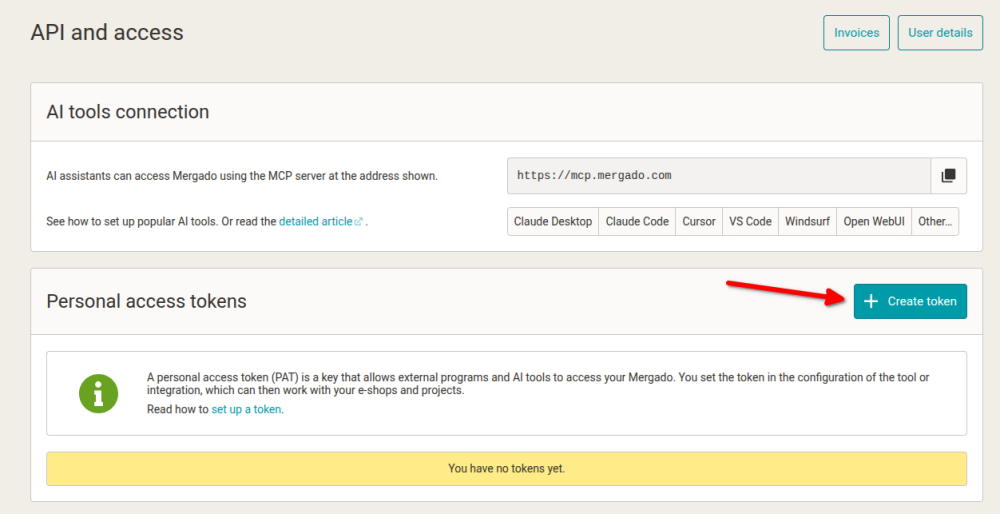
Click the Create token button.
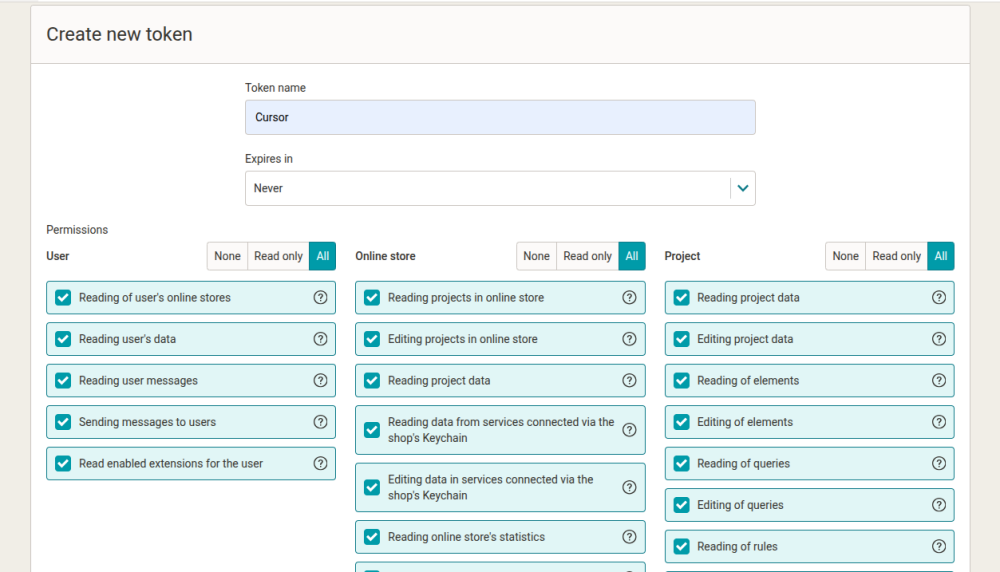
Enter a name for the token (for example Cursor), set its validity, and choose the required permissions.
For regular use of Mergado MCP, we recommend leaving all permissions enabled.
Once the token is created, copy its value right away.
Important: The Personal Access Token (PAT) value is shown only once. If you lose it later, you will need to create a new PAT.
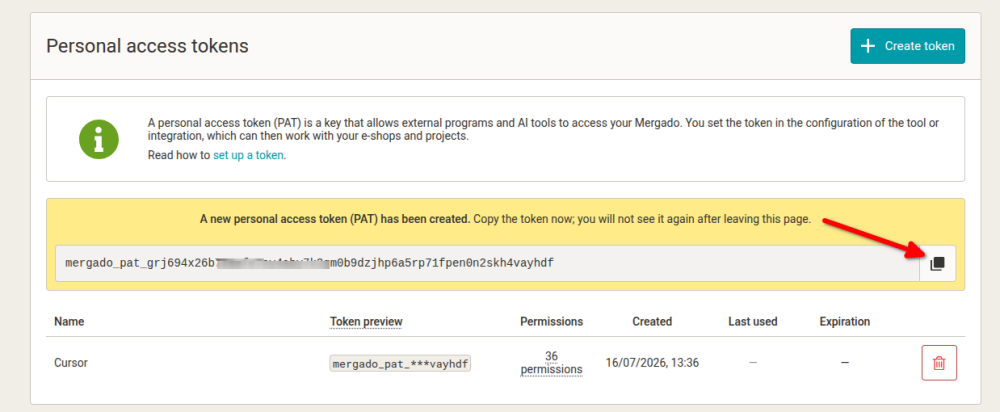
You can find more detailed information about Personal Access Tokens here:
https://help.mergado.com/en/account-management-and-billing/api-and-access/personal-access-token/
2. Open the MCP server settings#
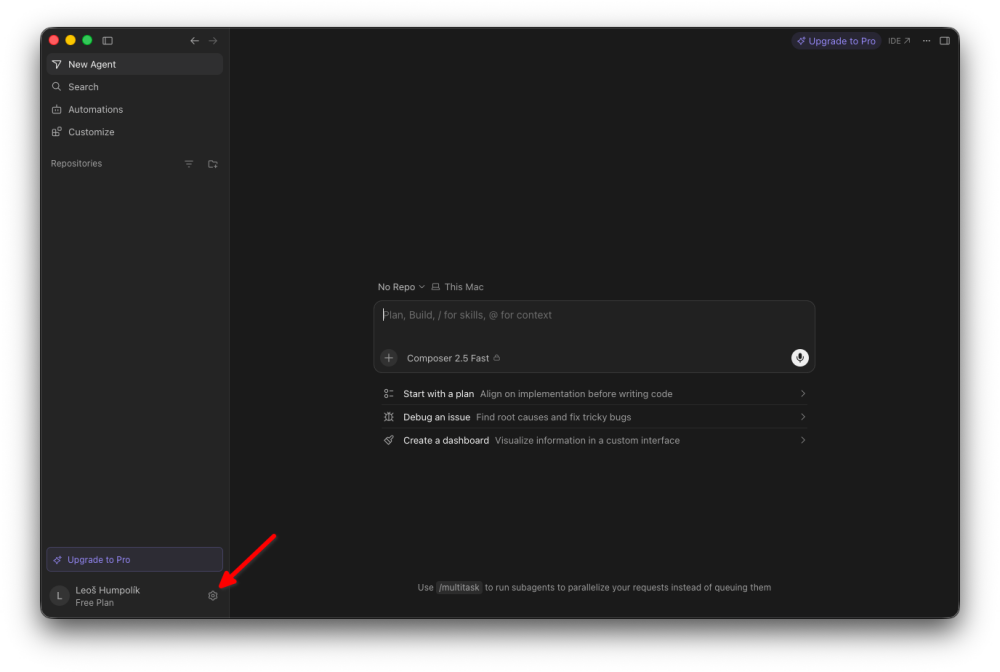
Click the Settings icon in the bottom-left corner.
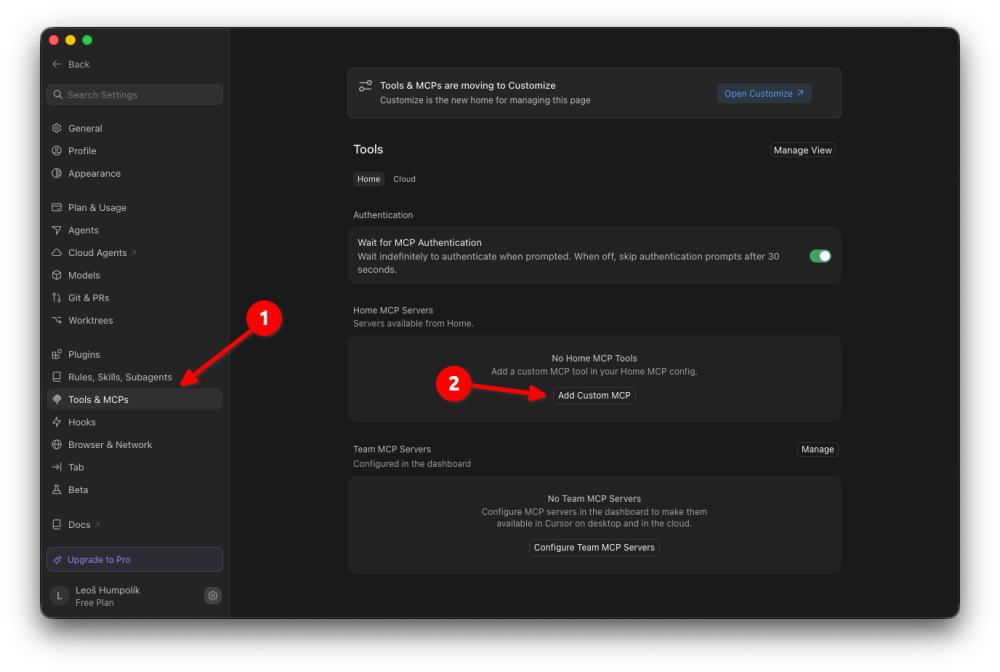
In the left-hand menu, open the Tools & MCPs section.
3. Open the configuration file#
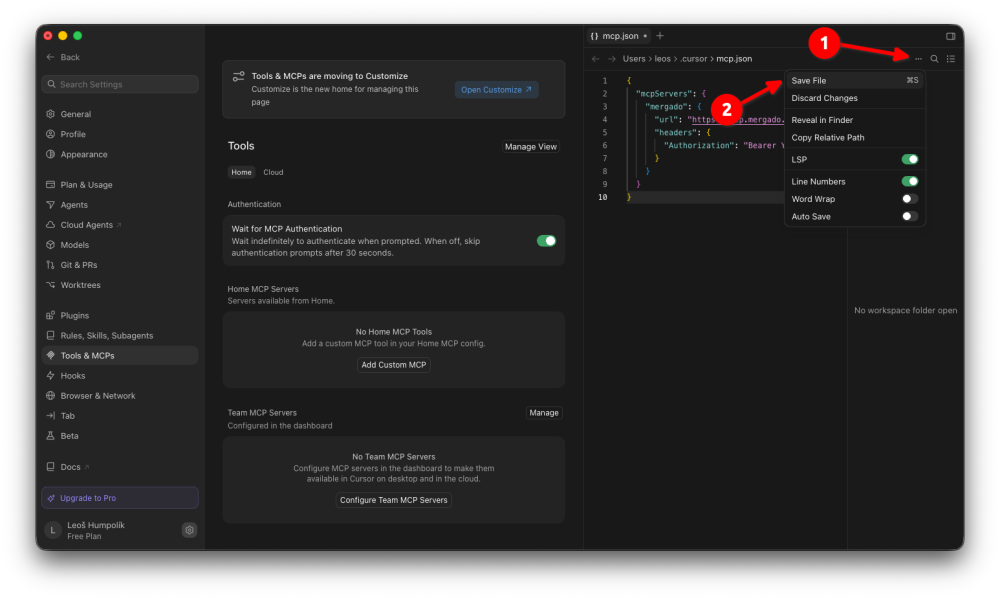
If you do not have any MCP server set up yet, click Add Custom MCP.
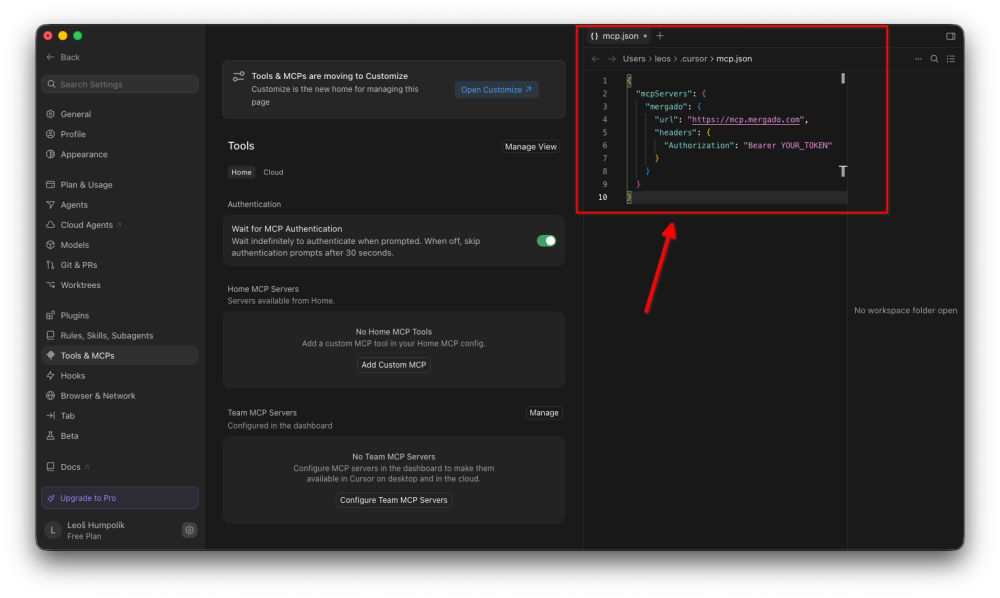
Cursor will automatically create and open the mcp.json configuration file.
4. Add the MCP server configuration#
Add the following configuration to the mcp.json file:
{
  "mcpServers": {
    "mergado": {
      "url": "https://mcp.mergado.com",
      "headers": {
        "Authorization": "Bearer YOUR_TOKEN"
      }
    }
  }
}
Replace the YOUR_TOKEN value with the Personal Access Token (PAT) you created.
5. Save the changes#
Save the mcp.json file.
6. Restart Cursor#
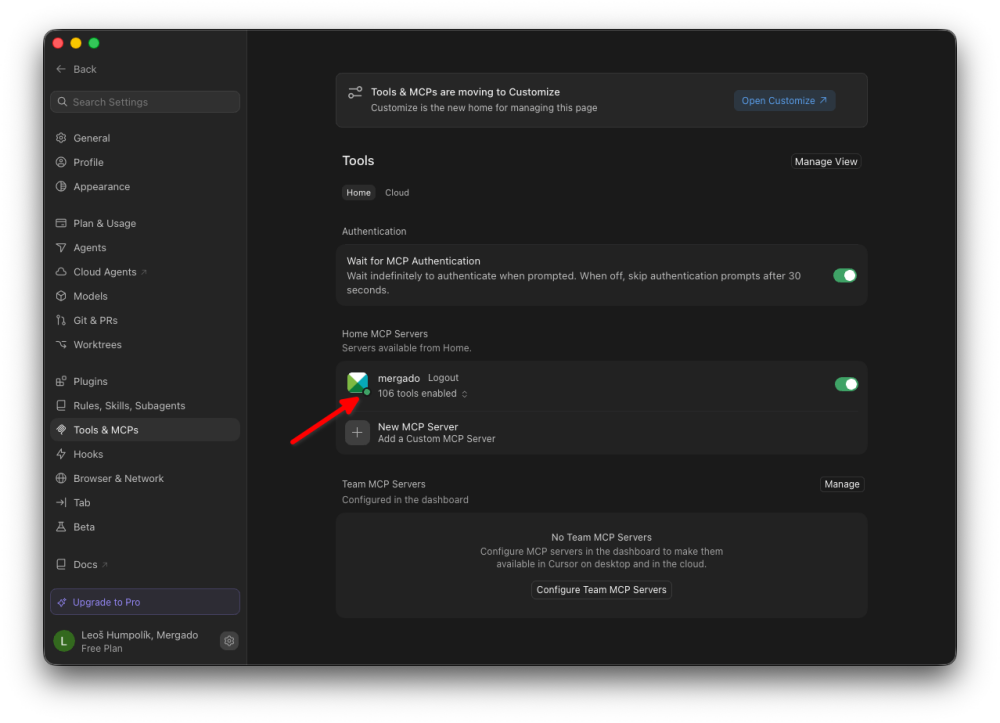
After restarting the application, open the Tools & MCPs section again.
If everything is set up correctly, the mergado server will appear along with information about the available tools.
7. Verify the connection#
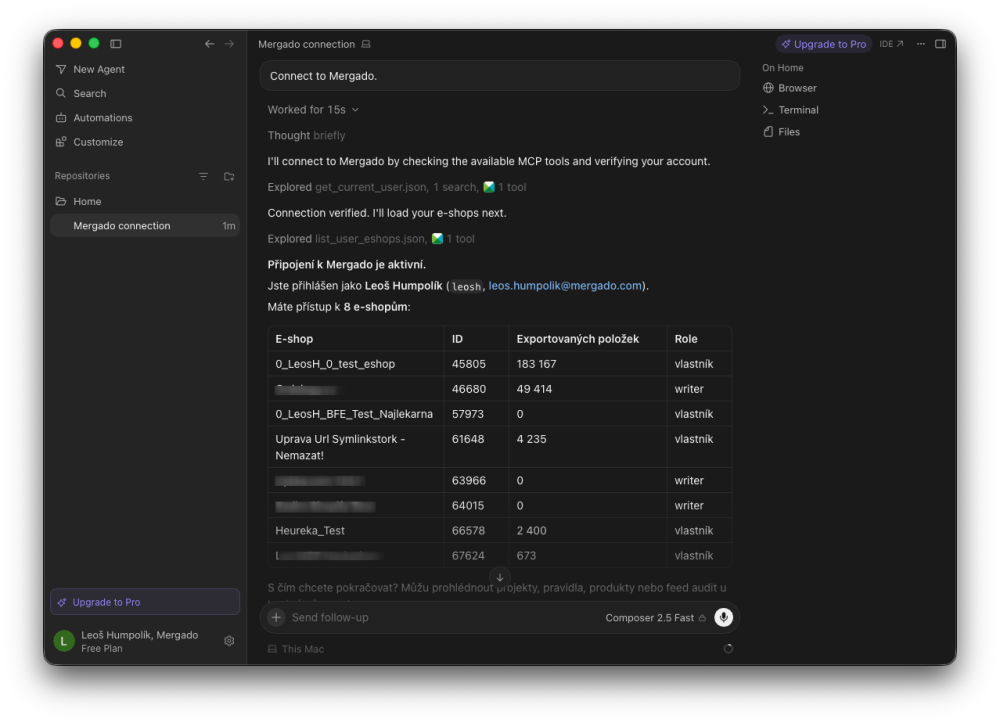
Open a new chat and try entering, for example:
Connect to Mergado.or
Can you connect to Mergado?If everything is set up correctly, Cursor will verify the connection, display information about your account, and be ready to use the Mergado MCP tools.