
Background removal#
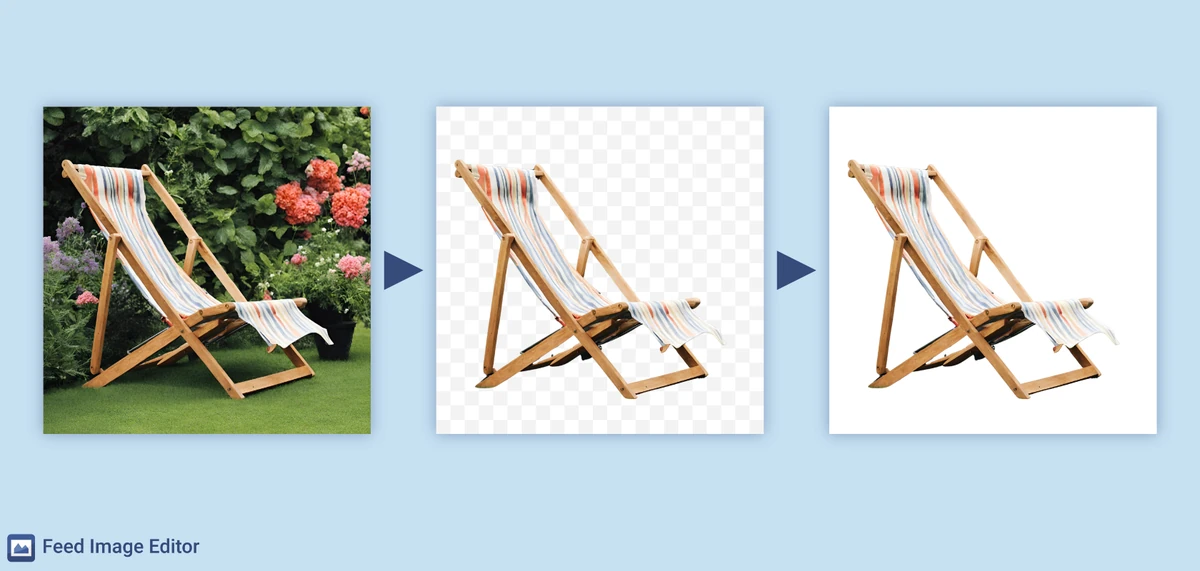
Background removal is an AI feature in Feed Image Editor that removes the background from product images in bulk and automatically. The result is a product on a transparent or replacement background, without having to manually edit every single image.
Why it matters#
Most price comparison sites and marketplace platforms require a white background free of distracting elements. Images that do not meet this requirement will not make it into ads. The most common issues include:
-
a background color other than white,
-
a product photo set in an interior or environment,
-
a background containing graphic elements, text, or watermarks that do not touch the product itself.
How it works#
The AI detects the product in the image, separates it from the background, and removes the background. Processing runs in bulk across the whole feed or a selected product query, without any further action needed from the user.
Setting it up in the extension#
Background removal is set up through graphic templates in Feed Image Editor:
-
In the top bar, click Templates -> New template.
-
In the right panel, select the product query the template will apply to.
-
Turn on the Background removal feature and set the effect sensitivity.
-
Choose the output format, name the template, and save it.
Effect sensitivity#
Sensitivity determines how aggressively the AI separates the product from the background. Three levels are available:
-
High sensitivity – less aggressive cropping, suitable where there is a risk of the AI removing part of the product too (for example, a white product on a white background or a product with thin details).
-
Medium sensitivity – the default choice for most images.
-
Low sensitivity – more aggressive cropping, suitable when medium sensitivity is not enough to remove the background completely.
Edge smoothing#
After the background is removed, the outline of the product may have jagged edges, especially with lower-quality images, products with thin or complex shapes, and products whose color blends with the background color. Feed Image Editor automatically smooths the edges as part of the background removal process, so there is nothing extra to configure.
Manual fine-tuning#
If the result of the automatic processing does not match your expectations even after changing the sensitivity, you can fine-tune images individually. On the Previews page, simply select a specific image and use the brush or the eraser to adjust the product’s contours – add back a removed part or remove leftover background.
What to do with the background after removal#
After removing the background, you can replace the area behind the product within the template, for example with a solid color, a custom graphic background, or leave it transparent. If the goal is to meet price comparison sites’ requirements for a white background, simply set white as the replacement.
FAQ#
Does background removal also work for lifestyle photos with a complex environment?#
Yes. The feature handles complex backgrounds as well (interiors, nature, more complex scenes). For images where the product’s color is very similar to the background color (for example, a white product on a white background), we recommend setting a higher sensitivity and checking the results on the Previews page.
What happens to the transparent background in the output feed?#
Images with a transparent background are output in PNG format. If the target platform requires a specific background color (most often white), you can set it as a replacement in the template, and the output file will then be JPEG or PNG with a solid color.
Can I use the feature on only part of the products, not the whole feed?#
Yes. The template is applied to a chosen product query, so it can be limited, for example, to products from a specific category, supplier, or products where diagnostics has detected an unsuitable background.
What is the difference between background removal and inpainting?#
Background removal works with the whole layer behind the product and removes it as a whole. Inpainting, on the other hand, targets a specific marked area within the image, typically an element that overlaps the product directly (a logo, a label). The features complement each other: if a watermark or unwanted element does not touch the product, Background removal is enough; if it does touch the product, Inpainting is more suitable, or the Watermark removal feature.
What should I do if the AI removes part of the product too?#
First, increase the effect sensitivity (medium or high) and repeat the processing. If the problem persists, use the manual fine-tuning on the Previews page, where you can adjust a specific image individually with the brush.
Can background removal be combined with adding graphic elements within a single template?#
Yes. Within a graphic template, Background removal can be combined with other edits and layers such as adding a logo, a price tag, a color bar, or other graphic elements.